Monday, January 31, 2011

Entry Hall Table - It Didn't Look That Big In The Store!

Sunday we went shopping for something to buy at Gallery Furniture.

You see, we had a Groupon - purchased for $50 worth $200 at Gallery Furniture - and it was getting ready to expire, so we had to buy 'something'!

Here in Houston, Mattress Mac at Gallery Furniture is an icon. He opened the store years ago with cheesy commercials with him jumping up and down yelling "Gallery Furniture really will SAVE YOU MONEY!" Now the store is huge and they sell some nice furniture, the Groupon was a deal, so we bought it. Now we were faced with having to buy something, anything, worth $200 or more.

We spent the better part of the day driving out there and roaming around trying to figure out what to buy. Finally we bought the sofa table to put in our entryway. We knew better, we knew we needed something 14" deep or less but did it anyway (it's 20 inches deep!). Now we have a massive piece of furniture and nowhere to put it.

We'll be driving back out to Gallery Furniture next weekend, paying the 10% restocking fee, and then picking out something new (return policy is exchange only). How much you want to bet we spend some more money.

I'll let you know.

Till later ~

Reba

Wednesday, January 26, 2011

Favorite Blogs

I follow a lot of blogs about crafting, decorating, and furniture refurbishing and thought it might be nice to share my top three blogs and the recent posts from each of those blogs that I like the most.

Miss Mustard Seed's Creative BlogMiss Mustard Seed's Creative Blog - I love Miss Mustard Seed's energy and creative style. Everything she does is beautiful and she shares the process with her readers.

Favorite Recent Post - French Chair Reveal, Glaze Mix, & Simple Upholstery -I love that I now know how to do the finish on that French chair, I would have never guessed that she started with such a bold turquoise.

Second Favorite Recent Post - Furniture Feature Friday-Favorites and A Link Party - I love that every Friday she does a link party for FURNITURE! All the other sites have link parties but none limit it to furniture - this one is the best of the web.

Better After - This was the very first website I followed. I absolutely LOVE to see the amazing transformations.

Favorite Recent Post - Top 12 of 2010 - My very favorite project in this post is the one from March where the crafter transformed a rolling hand-truck into a beautiful coffee table. Second fav was the chair that was recovered in a orange print fabric.

Show and TellShow & Tell - This lady does some amazing work, not only repurposing furniture, but also building it from scratch.

Favorite Recent Post - My Version Of A Farmhouse Table - You won't believe that she built a farmhouse table from reclaimed wood and did it INSIDE her house on her beautiful wood floors! Anyway, it's beautiful! Amazing!

So there you have it - my current top three favorite blogs. When I see a post from one of these sites in my blog reader and always click - maybe you should too!

Till later ~

Reba

Tuesday, January 25, 2011

Remembering - Our Kitchen Renovation - During

As promised but a little late, this post is to show pics and comments DURING the kitchen renovation.

We started the process some time in April and got to the point where we could cook in November, actually, we made Thanksgiving Dinner! That was our goal, to have Thanksgiving Dinner at our house. I really thought we'd be totally finished but we weren't. We still needed to put up the crown molding and finish the light rail. But hey, you don't need that stuff to cook, right?

The crown has since been done (thank goodness), almost. We were two inches short on crown molding! Yes, TWO INCHES! I finally ordered the last piece today, it should be here in about 12 days. Not cheap - total cost for that last piece - $96. If you ever do this, be sure to order enough, it wasn't a lot cheaper, but it was about $30 less per piece when ordered with everything else. That darn freight.

Now remember, the kitchen wasn't the only thing we were working on - it wouldn't have taken six months to do JUST the kitchen. But between scheduling the subcontractors and everything that went into all the renovations, the kitchen ended up taking a lot longer than most. 

Okay, here are the pics we have.

Drywall and Ceiling

Now, remember, we ended the demo here.

Drywall up - still need to tape and float. Notice the ceiling still has plastic over the gaping hole. Oh, you can also see that we built a pantry by the window to the right - sorry, didn't get pics of that.

Taped and floated - ceiling drywalled. We're ready to install cabinets now.    The ceiling still needs to be textured but we had that done after the cabinet install.

Cabinets Are Delivered! 
Yay, we waited four weeks for delivery after placing the order.

Garage BEFORE cabinet delivery.

Cabinet delivery.

Garage AFTER cabinet delivery.

Cabinet dry fit. The floor is unlevel from the front of the house to back about 1-1/2 inches. We were really wondering how in the heck this was going to work!

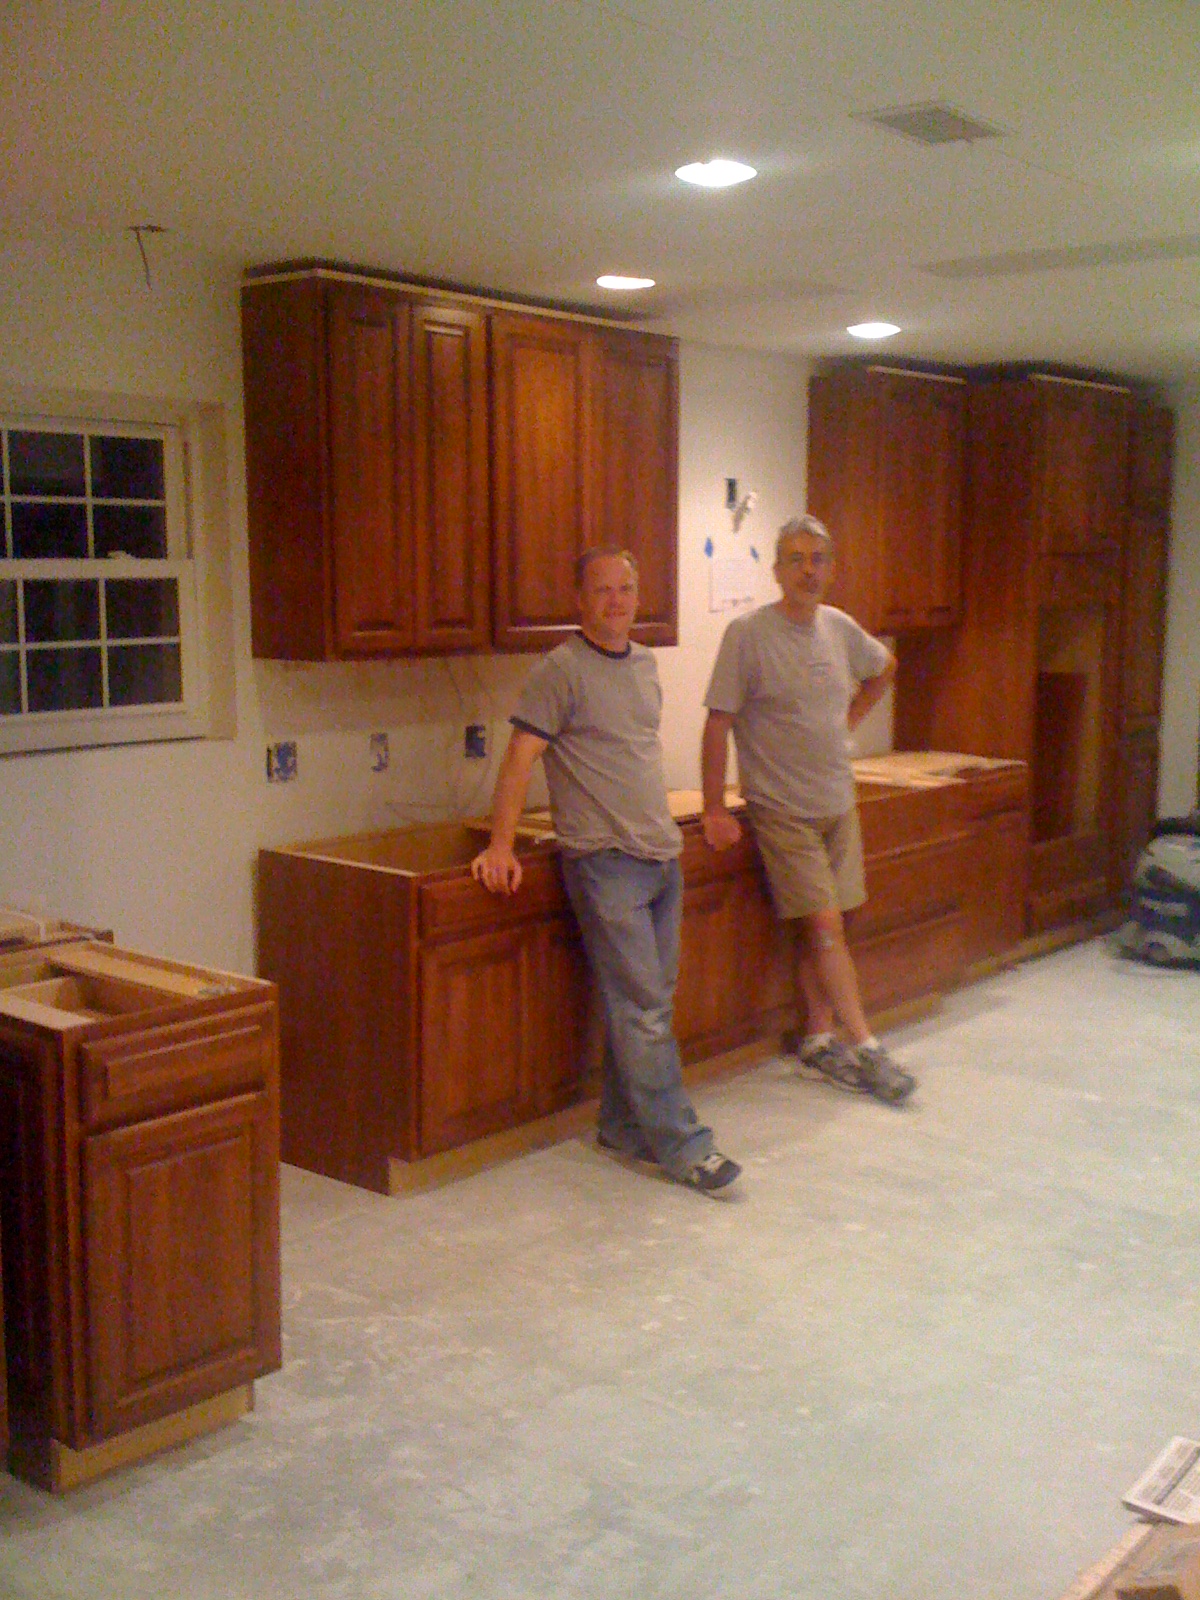
Well...we figured it out - we thought. Zack (my super handy and wonderful son-in-law) and Brent (my fabulous hubby) did a FANTASTIC job. Lookin' good! Little did they know that because the cabinets sat way too high off the floor in the back of the kitchen (keeping the cabinets level but the floor dropped) the bottom ones would have to be removed and reinstalled.

You see, we worked from the high end of the floor all the way around to the low side. We ended up with the last cabinet being shimmed off the floor 1-1/2 inches. When we re-installed them, we started at the dishwasher, which was about the middle, and worked out to the ends. We were left shimming up only about half an inch. We were able to get away with this because the last cabinet on the high end was floor to ceiling and we didn't have to level the top for the counter top. Whew!
Next Came The Tile Floor

The floor guys really knew their stuff. They did the entryway, kitchen and hall bath in three LONG days. Here are a few pics of the kitchen and breakfast area floor.

Here's the tile - Italian porcelain. We chose porcelain over travertine because it's easier to care for and less expensive. Still beautiful though.

Really pretty! See my paint chips on the wall in the distance. That was another hard decision - there were a ton of hard decisions!

Breakfast area and laundry room in distance. Kitty doesn't care that they told us to stay off overnight.
Finally the Refrigerators

One of the fridges had been set-up in the dining room but it was nice to be able to move them into the kitchen. We also installed Brent's 'beverage' fridge under the bar.


Okay, Now We're Ready for GRANITE!!!

Above I said picking the paint color was hard, well if that was hard, picking the granite was torture. It was the middle of August in Houston - pert near 100 degrees outside - and they keep the granite in big hot yards with absolutely no shade. And I think the granite holds the heat and radiates it back out at you. I thought I was going to die before I finally found the slab I wanted. It took me two weeks and about six trips to the granite yard.

Here's the one I finally picked. I had to buy two slabs, thank goodness they had two. The first slab I picked they only had one.


We had to get the cabinets ready with plywood tops. Zack did that. Oh and sometime in there, Zack and our electrician installed the oven. That was only after we modified the cabinet somewhat, the oven was bigger than the salesman said it was...we thought it was standard, it wasn't. Brent and Zack wanted to return it, I persisted that they could modify it. Low and behold, I was right!!


 Next the fabricator came and measured, then a few days later, they installed. It was really messy with all the grinding and dust. It took about 5-6 hours and they did a beautiful job.


After the Granite Install


Oh, sometime before the granite we had our electrician install the under cabinet LED lighting. By the way, it is to die for, I'm totally spoiled and couldn't cook without it now.


Celebrating this milestone with a beer and some wine!
After that, Zack installed the dishwasher, garbage disposal, faucet and cooktop. Now we were in business! We actually started USING the kitchen at this point.

Next Was The Backsplash and Mosaic

I purchased the mosaic backsplash from a website out of Lebanon, and no, that's not Lebanon, TX. It was handmade with marble starting from the time I ordered it, it took about four weeks to get to me. The whole time I was prepared for it to never show up and be out all my money - but that didn't happen and it arrived on schedule.


We chose tumbled travertine for the backsplash. It took two days to install the mosaic and backsplash.


The following weekend I sealed the travertine and marble.

Last was the crown molding. Zack didn't want to attempt it because of the cost, he was scared of messing it up. We had a hard time finding a trim carpenter to do the work but finally a neighbor recommended one and we got it done.

You'll see the finished product in my next post some time next week. I want to take some new pictures when the kitchen is tip top and it's not there yet. I need to find the right piece of art and I want to be sure everything is in its place. Hopefully the only thing missing will be some kind of window valance...oh, and the piece of crown that we were short by two inches.


Till later ~

Reba

Sunday, January 16, 2011

Remembering - Our Kitchen Renovation - Before & Demo

I truly regret not starting this blog when we purchased our home back in April 2010 but I was so busy with the renovation, I probably wouldn't have updated it anyway. So now that we're almost finished, I will 'remember' our renovation, one room at at time.

First is our kitchen. It was the most dramatic change and the most expensive, so it's the best place to start.

Here are the before pics, these were taken after we made the offer to buy but hadn't purchased yet. It was some time in March 2010.

As you look at the before pics you'll probably think, those cabinets look pretty good, why did they feel like they needed to change them? Well, if you had seen them in person, you'd understand, the sink cabinet was crumbling from a leak in the sink plumbing and the laminate was peeling off. They were bad. We did keep the ones in the laundry (for now).


The room beyond was the dining room, the refrigerator went right by the door where the outlet is on the wall.
Dishwasher went on the left of the sink, the previous owners took it with them. See the hole in the tile? Interior foundation work was just completed.

A close up of the hole - this wasn't the only one, there were about 8 of them throughout the house.
It was nice to have a lot of pantry space but how old is that oven?
The cooktop was on the peninsula that overlooked the den. There was a HUGE exhaust fan over the cooktop so you couldn't see anyone in the den even if you wanted to. The breakfast area is beyond the peninsula.
Here's the view from the den - see the monstrosity exhaust fan?
See how the floor of the cabinet under the sink is wet? Sink was leaking - for a long time - when we pulled out the cabinet, the floor and backside crumbled - yeah - it crumbled. Pics later in the post.
No dishwasher - who takes a dishwasher when they move out? Especially these people - they ran a - I'm going to misspell this because I don't want google to pick it up - pros = titu-shun ring - yeah, really, we found the news articles on the internet from when they got busted. More on that later.

Next I'll show you the work that led to the transformation. This is the demo phase ONE.
The contractor that we ended up firing took up the tile floor. Brent and I removed the upper cabinets one evening after work.
Next, Brent and I spent a Sunday removing everything else, including the wall between the kitchen and dining room. The hardest part of this was moving the oven microwave combo, it was too heavy for both Brent and I together (like I was a lot of help). He ended up taking the two units apart and using the dolly to get it out of the house. Putting it in the dumpster about killed me.


Not very clear, but that's some of the crumbled cabinet where the sink was leaking.
I won! I got the biggest piece off the wall without it breaking!
This isn't just the kitchen, it's the drywall from the living room and bathroom along with the old bathtub and all the tile that was removed.
Also most done with demo - still needed to remove the drywall from the outer walls so we could replace the insulation and redo the plumbing. If you look hard you can see the ice maker water pipe in the old wall, that had to be moved to the new location for the refrigerators.

Now demo phase TWO - this is where we took down the studs to the wall between the dining and kitchen and found damage. Brent and Zack reinforced two ceiling joists that ran across the top of the kitchen. Somewhere in there, we took down the drywall on the outer walls and had the electrician install recessed lighting.


It's hard to see but the joist was cracked horizontally.

Looking up into the attic you can see the top part of the chimney. It was painted white at some point in its life.

We had the 2x4 supporting the cracked joist. In the background you can see where we moved the opening to the new dining room (that used to be the formal living room). We had our new refrigerators and a borrowed microwave in there, that was where we kept some essential foods (like water!), but we ate out every meal.


As you can see, we had a huge hole in the ceiling and this was in the middle of the Houston summer. We put plastic over it until the drywallers could get it fixed.

I never got a pic with ceiling open and the studs on the front wall showing but this pic gives you a good idea of what the kitchen looked like for quite a while, probably longer than we should have let it go.

Sometime after this, the plumber came in and replumbed all the water lines on the west side of the house including the laundry room and moved the gas line so we could relocated the the cooktop.  

Now that I've got it torn down for you, sometime next week I'll post the building up phase where we drywalled, tiled, put in cabinets, countertops, and appliances. Whew! It seems so long ago, it's hard to believe we really did all that!

Till later,

Reba~